When it comes to woodworking, achieving a flawless finish can be a challenging task, especially when dealing with imperfections such as holes, cracks, and dents. Wood putty is a crucial tool in the woodworking process, allowing craftsmen to fill in these gaps and create a smooth surface for staining. With so many products available on the market, selecting the right one can be overwhelming, particularly for those who are new to woodworking. The key to a successful project lies in choosing a putty that is specifically designed for staining, as it will ensure a seamless blend with the surrounding wood.
For woodworkers seeking to elevate their craft, finding the best wood putties for staining is essential. A good wood putty should be easy to apply, dry quickly, and match the color of the wood seamlessly. It should also be durable and resistant to cracking or shrinking over time. With the numerous options available, it can be difficult to determine which product is the most suitable for a particular project. In this article, we will delve into the world of wood putties, exploring the features, benefits, and drawbacks of various products to help woodworkers make informed decisions and achieve professional-grade results. Whether you’re a seasoned craftsman or a DIY enthusiast, this guide will provide you with the knowledge and expertise needed to select the perfect putty for your next woodworking project.
Before we start our review of the best wood putties for staining, here are some related products you can find on Amazon:


Introduction to Wood Putties
Wood putties are a type of filler used to repair and fill in holes, gaps, and other imperfections in wood surfaces. They are an essential tool for woodworkers, carpenters, and DIY enthusiasts, as they help to create a smooth and even finish. Wood putties come in a variety of types, including water-based, oil-based, and epoxy-based, each with its own unique characteristics and uses.
When it comes to staining wood, using the right type of putty is crucial to achieving a professional-looking finish. The putty should be able to blend in seamlessly with the surrounding wood, without leaving any visible signs of repair. This is where the best wood putties for staining come in, as they are specifically designed to be stainable and can help to create a beautiful and durable finish.
One of the key benefits of using wood putties is that they can help to save time and money by reducing the need for extensive repairs. By filling in small holes and gaps, wood putties can help to prevent further damage and extend the life of the wood. Additionally, wood putties can be used to create a variety of decorative effects, such as creating intricate designs or patterns on the wood surface.
In order to get the best results from wood putties, it’s essential to choose a high-quality product that is suitable for the specific type of wood being used. By selecting the right putty and following the manufacturer’s instructions, users can achieve a professional-looking finish that is both beautiful and durable. Whether you’re a seasoned woodworker or a DIY enthusiast, using the right wood putty can make all the difference in the quality of your finished project, and can help you to find the best wood putties for staining that meet your needs.
Top 5 Best Wood Putties For Staining
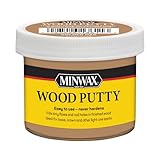
The
1. Minwax High-Performance Wood Filler 1
is a popular choice among woodworkers for staining. It is a two-part wood putty that consists of a resin and hardener, which are mixed together to create a strong and durable bond. This putty is suitable for a variety of applications, including filling holes, cracks, and gouges in wood surfaces. It can be stained to match the surrounding wood, making it a great option for furniture makers and woodworkers who want a seamless finish.
The Minwax High-Performance Wood Filler 1 is easy to mix and apply, and it dries quickly to a hard, sandable finish. It is also resistant to shrinkage and cracking, which makes it a great choice for filling large holes or gaps in wood surfaces. The putty can be stained with a variety of stains, including oil-based and water-based stains, and it accepts stain well, resulting in a finish that is indistinguishable from the surrounding wood. Overall, the Minwax High-Performance Wood Filler 1 is a high-quality wood putty that is well-suited for staining and is a great choice for woodworkers who want a professional-looking finish.
The
2. DAP Plastic Wood 2
is a versatile wood putty that can be used for a variety of applications, including filling holes, cracks, and gouges in wood surfaces. It is a solvent-based putty that is easy to apply and dries quickly to a hard, sandable finish. The DAP Plastic Wood 2 is suitable for staining and can be colored to match the surrounding wood, making it a great option for furniture makers and woodworkers who want a seamless finish.
The DAP Plastic Wood 2 is a high-quality wood putty that is resistant to shrinkage and cracking, making it a great choice for filling large holes or gaps in wood surfaces. It can be stained with a variety of stains, including oil-based and water-based stains, and it accepts stain well, resulting in a finish that is indistinguishable from the surrounding wood. The putty is also easy to sand and can be shaped to fit intricate profiles, making it a great choice for woodworkers who want a professional-looking finish. Overall, the DAP Plastic Wood 2 is a reliable and effective wood putty that is well-suited for staining.
The
3. Elmer’s Wood Filler 3
is a popular choice among woodworkers for staining. It is a water-based putty that is easy to apply and dries quickly to a hard, sandable finish. The Elmer’s Wood Filler 3 is suitable for a variety of applications, including filling holes, cracks, and gouges in wood surfaces. It can be stained to match the surrounding wood, making it a great option for furniture makers and woodworkers who want a seamless finish.
The Elmer’s Wood Filler 3 is a high-quality wood putty that is resistant to shrinkage and cracking, making it a great choice for filling large holes or gaps in wood surfaces. It can be stained with a variety of stains, including oil-based and water-based stains, and it accepts stain well, resulting in a finish that is indistinguishable from the surrounding wood. The putty is also easy to sand and can be shaped to fit intricate profiles, making it a great choice for woodworkers who want a professional-looking finish. Overall, the Elmer’s Wood Filler 3 is a reliable and effective wood putty that is well-suited for staining and is a great choice for woodworkers who want a high-quality finish.
The
4. 3M Bondo Wood Filler 4
is a high-strength wood putty that is designed for filling large holes and gaps in wood surfaces. It is a two-part putty that consists of a resin and hardener, which are mixed together to create a strong and durable bond. The 3M Bondo Wood Filler 4 is suitable for a variety of applications, including filling holes, cracks, and gouges in wood surfaces. It can be stained to match the surrounding wood, making it a great option for furniture makers and woodworkers who want a seamless finish.
The 3M Bondo Wood Filler 4 is easy to mix and apply, and it dries quickly to a hard, sandable finish. It is also resistant to shrinkage and cracking, which makes it a great choice for filling large holes or gaps in wood surfaces. The putty can be stained with a variety of stains, including oil-based and water-based stains, and it accepts stain well, resulting in a finish that is indistinguishable from the surrounding wood. Overall, the 3M Bondo Wood Filler 4 is a high-quality wood putty that is well-suited for staining and is a great choice for woodworkers who want a professional-looking finish.
The
5. J-B Weld WoodRestore 5
is a premium wood putty that is designed for filling holes, cracks, and gouges in wood surfaces. It is a two-part putty that consists of a resin and hardener, which are mixed together to create a strong and durable bond. The J-B Weld WoodRestore 5 is suitable for a variety of applications, including filling holes, cracks, and gouges in wood surfaces. It can be stained to match the surrounding wood, making it a great option for furniture makers and woodworkers who want a seamless finish.
The J-B Weld WoodRestore 5 is easy to mix and apply, and it dries quickly to a hard, sandable finish. It is also resistant to shrinkage and cracking, which makes it a great choice for filling large holes or gaps in wood surfaces. The putty can be stained with a variety of stains, including oil-based and water-based stains, and it accepts stain well, resulting in a finish that is indistinguishable from the surrounding wood. Overall, the J-B Weld WoodRestore 5 is a high-quality wood putty that is well-suited for staining and is a great choice for woodworkers who want a professional-looking finish.
Why Wood Putties are Essential for Staining
When it comes to woodworking and furniture restoration, achieving a flawless finish is crucial. One of the most common issues that can ruin the appearance of a wooden surface is the presence of holes, dents, and scratches. These imperfections can be challenging to conceal, especially when staining the wood. This is where wood putties come into play, as they provide a simple and effective solution to fill in these gaps and create a smooth surface.
Wood putties are specially designed to match the color and texture of the surrounding wood, making them virtually undetectable once applied and dried. They are available in various colors and types, allowing woodworkers to choose the one that best suits their needs. By filling in the imperfections with wood putty, individuals can ensure that their stained wood surface looks professional and polished. Moreover, using wood putty can save time and effort in the long run, as it prevents the need for costly and time-consuming repairs.
The process of using wood putty is relatively straightforward. First, the area to be filled is cleaned and prepared to ensure a strong bond between the putty and the wood. Then, the putty is applied to the hole or dent, and excess material is removed using a putty knife or other tool. Once the putty is dry, the surface can be sanded and stained, resulting in a beautiful and even finish. For those looking to achieve the best results, researching the best wood putties for staining can help them make an informed decision and choose a high-quality product that meets their needs.
In conclusion, wood putties play a vital role in the staining process, as they enable woodworkers to create a smooth and even surface that is free from imperfections. By using wood putty to fill in holes and dents, individuals can ensure that their stained wood surface looks professional and polished. With the wide range of wood putties available on the market, it is easier than ever to find the perfect product to suit specific needs and achieve a flawless finish. Whether working on a small DIY project or a large-scale woodworking endeavor, wood putty is an essential tool that can help individuals achieve their desired results.
Types of Wood Putties For Staining
Wood putties for staining come in various types, each with its unique characteristics and uses. One of the most common types is the water-based wood putty, which is easy to apply and dries quickly. It is suitable for most staining projects and can be used on a variety of wood surfaces. Another type is the solvent-based wood putty, which is more durable and resistant to scratches and cracks. However, it has a strong odor and requires more time to dry.
When choosing a wood putty for staining, it is essential to consider the type of wood you are working with. For example, if you are working with a softwood like pine or fir, a water-based wood putty may be the best option. On the other hand, if you are working with a hardwood like oak or maple, a solvent-based wood putty may be more suitable. Additionally, you should also consider the color of the wood and the stain you will be using, as some wood putties may affect the final color of the stain.
In addition to water-based and solvent-based wood putties, there are also other types available, such as epoxy-based and acrylic-based wood putties. Epoxy-based wood putties are highly durable and resistant to scratches and cracks, making them ideal for high-traffic areas. Acrylic-based wood putties, on the other hand, are flexible and can be used on a variety of wood surfaces, including those with intricate carvings or moldings.
The type of wood putty you choose will ultimately depend on your specific needs and the requirements of your project. By considering the type of wood, the color of the stain, and the level of durability required, you can select the best wood putty for your staining project. With the right wood putty, you can achieve a professional-looking finish and ensure that your wood surface looks its best.
Benefits of Using Wood Putties For Staining
Using wood putties for staining offers several benefits, including a smooth and even finish, improved durability, and enhanced appearance. Wood putties can fill in small holes and cracks, creating a smooth surface for staining. This ensures that the stain is applied evenly and consistently, resulting in a professional-looking finish. Additionally, wood putties can help to protect the wood from damage caused by scratches and cracks, making it more durable and long-lasting.
Another benefit of using wood putties for staining is that they can help to enhance the appearance of the wood. By filling in small holes and cracks, wood putties can create a uniform surface that showcases the natural beauty of the wood. This is especially important when working with expensive or exotic woods, where a smooth and even finish is crucial. Furthermore, wood putties can be stained to match the surrounding wood, creating a seamless and natural-looking finish.
Wood putties can also be used to repair damaged wood surfaces, making them a cost-effective and efficient solution. Instead of replacing the entire wood surface, you can simply apply a wood putty to the damaged area and stain it to match the surrounding wood. This can save you time and money, and help to reduce waste. Additionally, wood putties can be used to create intricate designs and patterns, adding an extra layer of creativity and beauty to your staining project.
In addition to these benefits, wood putties can also be used to create a variety of different effects, such as a distressed or vintage look. By applying a wood putty to the wood surface and then staining it, you can create a unique and eye-catching finish that adds character and personality to your project. With the right wood putty and staining technique, you can achieve a wide range of different effects and create a truly one-of-a-kind piece.
Common Mistakes to Avoid When Using Wood Putties For Staining
When using wood putties for staining, there are several common mistakes to avoid in order to achieve a professional-looking finish. One of the most common mistakes is applying too much wood putty to the surface. This can create a thick and uneven finish that is difficult to stain and may require additional sanding or scraping. To avoid this mistake, it is essential to apply a thin and even layer of wood putty to the surface, using a putty knife or other tool to spread it evenly.
Another mistake to avoid is not allowing the wood putty to dry completely before staining. This can cause the stain to be absorbed unevenly, resulting in a patchy or streaked finish. To avoid this mistake, it is essential to allow the wood putty to dry completely according to the manufacturer’s instructions, which can range from a few minutes to several hours. Additionally, it is important to sand the surface lightly before staining to create a smooth and even finish.
Not sanding the surface before applying the wood putty is another common mistake to avoid. This can create a rough and uneven finish that is difficult to stain and may require additional sanding or scraping. To avoid this mistake, it is essential to sand the surface lightly before applying the wood putty, using a fine-grit sandpaper to create a smooth and even finish. Additionally, it is important to clean the surface thoroughly before applying the wood putty, using a tack cloth or other tool to remove any dust or debris.
By avoiding these common mistakes, you can achieve a professional-looking finish and ensure that your wood surface looks its best. With the right techniques and materials, you can create a smooth and even finish that showcases the natural beauty of the wood. Whether you are a beginner or an experienced woodworker, using wood putties for staining can be a fun and rewarding project that adds beauty and character to your home or workshop.
Tips and Tricks for Using Wood Putties For Staining
When using wood putties for staining, there are several tips and tricks to keep in mind in order to achieve a professional-looking finish. One of the most important tips is to choose the right color of wood putty for your project. This can be tricky, as the color of the wood putty may affect the final color of the stain. To avoid this problem, it is essential to test the wood putty on a small, inconspicuous area of the wood surface before applying it to the entire surface.
Another tip is to apply the wood putty in thin layers, allowing each layer to dry completely before applying the next. This can help to prevent the wood putty from building up too quickly and creating a thick and uneven finish. Additionally, it is important to use a putty knife or other tool to spread the wood putty evenly, creating a smooth and consistent finish. By following these tips, you can achieve a professional-looking finish and ensure that your wood surface looks its best.
In addition to these tips, it is also important to consider the type of stain you will be using and how it may interact with the wood putty. For example, some stains may be more prone to bleeding or blotching, which can affect the final color and appearance of the finish. To avoid this problem, it is essential to test the stain on a small, inconspicuous area of the wood surface before applying it to the entire surface. By doing so, you can ensure that the stain and wood putty work well together and create a beautiful and durable finish.
By following these tips and tricks, you can achieve a professional-looking finish and ensure that your wood surface looks its best. Whether you are a beginner or an experienced woodworker, using wood putties for staining can be a fun and rewarding project that adds beauty and character to your home or workshop. With the right techniques and materials, you can create a smooth and even finish that showcases the natural beauty of the wood and lasts for years to come.
Ultimate Buying Guide for Wood Putties
When it comes to woodwork and furniture restoration, having the right tools and materials is crucial. One essential item in any woodworker’s toolkit is wood putty, which is used to fill in holes, gaps, and other imperfections in wood surfaces. With so many different types of wood putty available on the market, it can be difficult to know which one to choose, especially when it comes to staining. In this guide, we will explore the key factors to consider when selecting the best wood putties for staining, to help you make an informed decision.
Type of Wood Putty
The type of wood putty you choose will depend on the specific needs of your project. There are several different types of wood putty available, including water-based, oil-based, and epoxy-based. Water-based wood putty is a popular choice because it is easy to use and dries quickly. It is also a good option for projects where you need to stain the wood, as it will not affect the color of the stain. Oil-based wood putty, on the other hand, is more durable and resistant to wear and tear, but it can take longer to dry and may affect the color of the stain.
When choosing a type of wood putty, it’s also important to consider the color and texture of the wood you are working with. If you are working with a light-colored wood, you may want to choose a wood putty that is specifically designed to match that color. Some wood putties are also designed to be used with specific types of stain, so be sure to read the label carefully before making a purchase. By choosing the right type of wood putty for your project, you can ensure that your finished product looks professional and polished.
Drying Time
The drying time of wood putty is another important factor to consider. If you are working on a project where time is of the essence, you may want to choose a wood putty that dries quickly. Some wood putties can dry in as little as 15 minutes, while others may take several hours or even overnight. It’s also important to consider the temperature and humidity of your workspace, as these factors can affect the drying time of the wood putty. If you are working in a cold or humid environment, you may want to choose a wood putty that is specifically designed to dry quickly in these conditions.
When choosing a wood putty based on drying time, it’s also important to consider the trade-offs. While a fast-drying wood putty may be convenient, it may not be as durable or long-lasting as a slower-drying option. On the other hand, a slower-drying wood putty may give you more time to work with it and achieve a smooth finish, but it may also delay your project timeline. By considering your specific needs and priorities, you can choose a wood putty that balances drying time with other important factors.
Sandability
The sandability of wood putty is also an important factor to consider. If you are planning to stain your wood project, you will want to choose a wood putty that can be sanded to a smooth finish. Some wood putties are designed to be easy to sand, while others may be more difficult to work with. Look for a wood putty that is specifically labeled as “sandable” or “easy to sand,” and be sure to read the instructions carefully before applying it to your project.
When sanding wood putty, it’s also important to use the right techniques and tools. Start with a coarse-grit sandpaper and work your way up to finer grits, using a sanding block to keep the surface flat and even. Be careful not to sand too aggressively, as this can create scratches or swirl marks in the wood. By choosing a wood putty that is easy to sand and using the right techniques, you can achieve a smooth, professional-looking finish that is ready for staining.
Color and Texture
The color and texture of wood putty are also important factors to consider. If you are working with a specific type of wood, you may want to choose a wood putty that matches its color and texture. Some wood putties are designed to match specific types of wood, such as oak or pine, while others may be more versatile and can be used with a variety of wood types. Look for a wood putty that is specifically labeled as “color-matched” or “texture-matched,” and be sure to read the instructions carefully before applying it to your project.
When choosing a wood putty based on color and texture, it’s also important to consider the overall aesthetic you are trying to achieve. If you are working on a project where a natural, wood-like appearance is important, you may want to choose a wood putty that is designed to blend in with the surrounding wood. On the other hand, if you are working on a project where a more decorative or accentuated look is desired, you may want to choose a wood putty that is available in a range of colors and textures. By considering the color and texture of the wood putty, you can choose a product that meets your specific needs and helps you achieve the desired look.
Brand and Quality
The brand and quality of wood putty are also important factors to consider. While it may be tempting to choose a cheap or generic wood putty, it’s often worth investing in a higher-quality product from a reputable brand. Look for brands that specialize in wood putty and have a reputation for producing high-quality products. Some popular brands of wood putty include Minwax, Varathane, and DAP, and these products are often available at hardware stores and home improvement centers.
When choosing a wood putty based on brand and quality, it’s also important to read reviews and do your research. Look for products that have been rated highly by other customers, and be sure to read the instructions and label carefully before applying the wood putty to your project. By choosing a high-quality wood putty from a reputable brand, you can ensure that your project turns out professional-looking and long-lasting. Whether you are a professional woodworker or a DIY enthusiast, investing in the best wood putties for staining can make all the difference in the quality of your finished product.
Price and Value
The price and value of wood putty are also important factors to consider. While it’s often tempting to choose the cheapest option, it’s often worth investing in a higher-quality product that will last longer and provide better results. Look for products that offer a good balance of price and quality, and be sure to read the label and instructions carefully before applying the wood putty to your project. Some wood putties may be more expensive than others, but they may also offer additional features or benefits that make them worth the extra cost.
When choosing a wood putty based on price and value, it’s also important to consider the size and quantity of the product. If you are working on a large project, you may want to choose a wood putty that is available in a larger size or quantity, as this can be more cost-effective in the long run. On the other hand, if you are working on a small project, you may want to choose a smaller size or quantity to avoid wasting product. By considering the price and value of the wood putty, you can choose a product that meets your specific needs and budget, and helps you achieve professional-looking results.
Frequently Asked Questions
What is wood putty and how does it work?
Wood putty is a type of filler used to repair holes, cracks, and other imperfections in wood surfaces. It is typically made from a mixture of wood fibers, fillers, and binders, and is designed to be stained or painted to match the surrounding wood. When applied to a damaged area, the putty fills in the gap and hardens to create a smooth, even surface.
The putty works by bonding to the surrounding wood, creating a strong and durable repair. It can be sanded and stained to match the surrounding wood, making it nearly invisible. Wood putty is a popular choice for DIY projects and professional woodworking applications, as it is easy to use and provides a high-quality finish. With the right putty and application techniques, it is possible to achieve professional-looking results and extend the life of wooden furniture and other items.
What types of wood putty are available?
There are several types of wood putty available, each with its own unique characteristics and uses. Some common types of putty include water-based, solvent-based, and epoxy-based putties. Water-based putties are easy to clean up and dry quickly, making them a popular choice for many applications. Solvent-based putties are more durable and resistant to stains, but can be messier to work with and have stronger fumes.
Epoxy-based putties are extremely strong and durable, but can be more difficult to work with and require a longer drying time. There are also putties specifically designed for use with certain types of wood, such as cedar or redwood. Additionally, some putties are formulated to match specific stain colors, making it easier to achieve a seamless repair. By choosing the right type of putty for the job, it is possible to achieve a high-quality finish and ensure a long-lasting repair.
How do I choose the best wood putty for staining?
Choosing the best wood putty for staining involves considering several factors, including the type of wood, the color of the stain, and the desired finish. It is also important to consider the durability and strength of the putty, as well as its ease of use and clean-up. A good wood putty should be easy to apply, dry quickly, and sand smoothly.
When selecting a putty, look for products that are specifically designed for staining and are formulated to match the color of the surrounding wood. It is also a good idea to read reviews and follow the manufacturer’s instructions for application and drying times. By choosing a high-quality putty and following the right techniques, it is possible to achieve a professional-looking finish and ensure a long-lasting repair. Additionally, consider the brand reputation and the price of the product to ensure that it meets your needs and budget.
Can I use wood putty on any type of wood?
While wood putty can be used on many types of wood, it is not suitable for all types. Some types of wood, such as cedar and redwood, require special putties that are formulated to work with their unique characteristics. Other types of wood, such as plywood and MDF, may require putties that are specifically designed for use with engineered wood products.
It is also important to consider the moisture content of the wood, as putty may not adhere well to wood that is too wet or too dry. Additionally, some types of wood may be more prone to staining or discoloration, which can affect the appearance of the putty. By choosing a putty that is specifically designed for the type of wood being used, it is possible to achieve a strong and durable bond and ensure a high-quality finish.
How do I apply wood putty for staining?
Applying wood putty for staining involves several steps, including preparing the surface, applying the putty, and sanding it smooth. First, the surface should be cleaned and sanded to create a smooth, even base for the putty. The putty should then be applied to the damaged area, using a putty knife or other tool to fill in the gap and smooth out the surface.
Once the putty is applied, it should be allowed to dry according to the manufacturer’s instructions, which can range from a few minutes to several hours. After the putty is dry, it should be sanded smooth using a fine-grit sandpaper, and then stained to match the surrounding wood. It is also important to follow the manufacturer’s instructions for application and drying times, and to use the right techniques to achieve a smooth, even finish.
What are the benefits of using wood putty for staining?
Using wood putty for staining offers several benefits, including the ability to repair damaged wood surfaces and achieve a professional-looking finish. Wood putty is also relatively easy to use and can be applied to a variety of wood surfaces, making it a versatile and convenient option for many DIY projects and professional woodworking applications.
By using wood putty, it is possible to extend the life of wooden furniture and other items, and to restore them to their original beauty. Additionally, wood putty can help to prevent further damage to the wood, by filling in gaps and cracks that can allow moisture to penetrate and cause rot or decay. With the right putty and application techniques, it is possible to achieve a high-quality finish and ensure a long-lasting repair.
How long does wood putty take to dry and harden?
The drying and hardening time of wood putty can vary depending on the type of putty and the environmental conditions. Some putties can dry in as little as 15 minutes, while others may take several hours or even overnight. It is also important to consider the hardening time, which can range from a few hours to several days.
It is generally recommended to follow the manufacturer’s instructions for drying and hardening times, and to allow the putty to dry and harden completely before sanding or staining. This can help to ensure a strong and durable bond, and to prevent the putty from shrinking or cracking over time. By allowing the putty to dry and harden properly, it is possible to achieve a high-quality finish and ensure a long-lasting repair.
Conclusion
In conclusion, the art of woodworking requires attention to detail and a thorough understanding of the materials and tools used. When it comes to filling gaps and holes in wood, using the right putty can make all the difference in achieving a professional finish. With so many options available on the market, it can be overwhelming to choose the right one, especially when considering the staining process. However, by considering factors such as color, consistency, and durability, woodworkers can make informed decisions that will elevate their craft.
Ultimately, selecting the best wood putties for staining is crucial in achieving a seamless and polished finish. By investing in a high-quality putty that is specifically designed for staining, woodworkers can ensure that their projects turn out with a beautiful, professional finish. Whether you’re a seasoned craftsman or a DIY enthusiast, using the right putty can take your woodworking projects to the next level. With the right tools and materials, anyone can create stunning pieces of furniture and decor that will last for years to come, making the search for the perfect putty a worthwhile investment.